I will describe how to make umeboshi (picked plums).
I’ve tried a lot of different things in my 10 years of making homemade umeboshi, and I wrote this so that you can avoid making any mistakes, even if you’re a beginner.
There are two important things to know when making umeboshi.
The first is making sure to not use too little salt.
You should have five parts plum to one part salt.
If you use too little salt, the plums won’t excrete their juices, and they become more prone to going bad, so it’s important to use the correct amount of salt. Also, if you pickle the plums using a 18% (180g of salt per 1kg of plums) ratio, they will stay good for years if you keep them at room temperature.
Seeing how the taste of the umeboshi changes over a long period of time is very much a plus.
The second important thing is what type of container to pickle the plums in.
While some recipes pickle the plums in a simple Ziploc bag, I feel that pickling them in a proper container is both easier and less stressful.
With a Ziploc bag, the plums are stored inside an airtight bag, making it more likely for the plums to go bad during the two to three days when it excretes its juices, and making it imperative that you pay attention to any changes in temperature.
By the way, bowls and pots will work just fine when pickling plums.
How to Pickle Umeboshi
This is my umeboshi recipe.
While this recipe uses red shiso to give the umeboshi a reddish hue, it’s not necessary to add it.
I will explain the recipe further later using pictures.
| Plums | 1kg |
| Salt | 180g |
| Red Shiso | 200g |
| Salt | 40g |
- If the plums are still green, put them on a plate and leave them at room temperature until they turn yellow (which means it’s ripe.)
- Wash the plums gently so they don’t bruise, wipe off any moisture with a paper towel, and use a bamboo skewer to remove the stems.
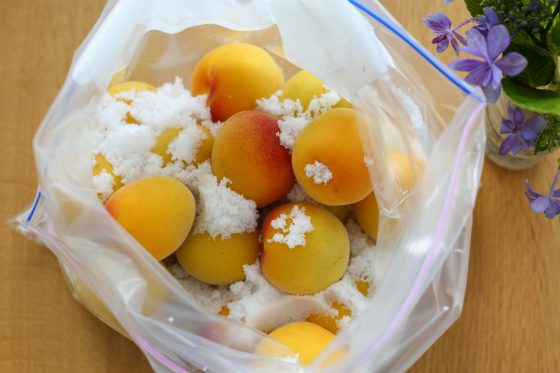
- Mix the salt and the plums in a clean container, with the salt going in on top of the plums.
Then, put a lid over the container, then something heavy on top of the lid.
Let it sit for two or three days, until it begins excreting juices. (Leave it until you can get red shiso.) - Remove the stems from the red shiso and wash it.
Be sure to remove any moisture.
Add 20g (half) of the salt to the red shiso, using your hands, and being sure to remove any moisture.
Then, add the last 20g (half), again using your hands, removing any moisture.
Add a good amount of plum juice to the red shiso, and mix well. - Add the red shiso to the plums, then cover it and put a weight over again.
Leave it until the rainy season ends. - When sunny days return, place the plums and the red shiso into a sieve, and let it sun dry, from a few hours, up to three days.
The plums will then be done, and now I will further explain the recipe using pictures.
How to Make Umeboshi
[Step 1]
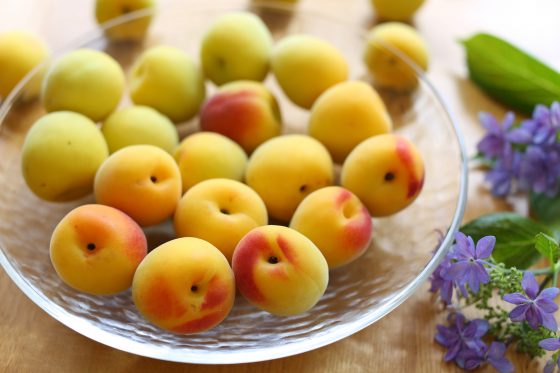
There are both green and yellow plums for sale during the rainy season, but umeboshi uses ripe, yellow ones.
While I recommend you buy plums that are already ripe, sometimes there will be plums that haven’t completely ripened.
In that case, you should place the plums on a plate, making sure they’re not on top of each other, and leave it at room temperature until it turns yellow.
When plums ripen, they fill the room with a sweet scent reminiscent of peaches.
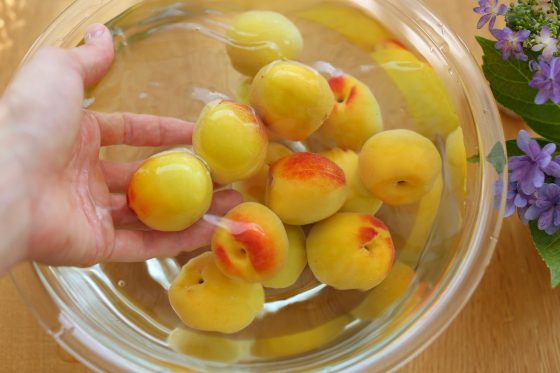
[Step 2]
After the plums turn yellow, wash them gently so they don’t bruise.
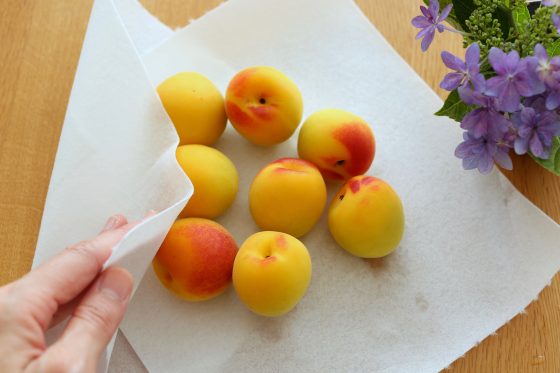
Wipe off any moisture using a paper towel.

Next, use a bamboo skewer to remove the stems.
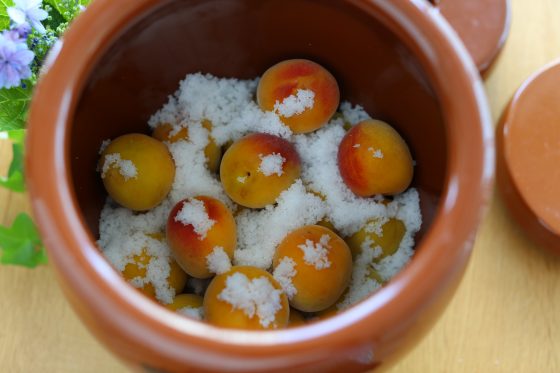
[Step 3]
Then, put the plums and salt (180g) into a clean preservation container, with the salt on top.
It doesn’t matter if you use a bowl or pot, by the way (you can also use cling film as a cover.) However, you should definitely avoid using metal, as its sensitive to salt and acid.
Try to use something made of enamel, plastic, glass or ceramics.
If you don’t have a bowl or pot that can be used to make umeboshi, a Ziploc (vinyl) bag will work, too.
Put the plums and salt into the bag, remove any air, and put something heavy on top of the bag.
However, since there is no air in the bag, you must squeeze the bag multiple times each day until it excretes juice, making sure to mix it all together.
Once the juice comes out, the following step is the same as if you pickled it in a container.

Now, I will go back to talking as if you used a container.
After adding the plums and salt to the preservation container, put a weight (roughly 2kg) over the cover, and once the plum juice (umezu) comes out, leave it for two to three days until the plums are submerged in juice.
If you still haven’t gotten any red shiso, leave it until you get some.
By the way, you can use a bowl with something heavy in it as a weight.
You can also use cling film as a cover.
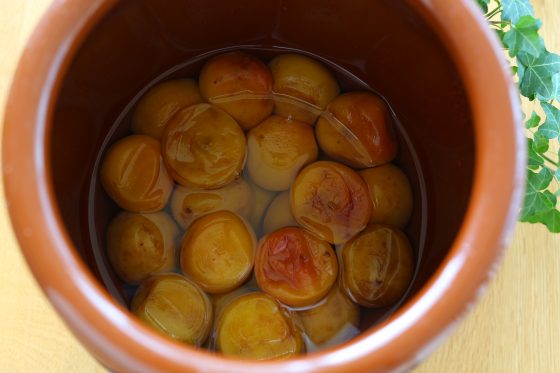
Once the plum juice (umezu) comes out it should look like this.
If no umezu comes out after three days, try adding more weight.
If you made sure to keep the salt at a 18% ratio, the juice should eventually come out.
The juice will often not come out if you add too little salt.

[Step 4]
Once you get red shiso, add salt to it to remove the scum.
First, remove the stems from the red shiso and wash it well, making sure to remove any moisture afterwards.
If you can, wipe it down with a paper towel.
Once you’ve done that, it will be easier to remove the scum.
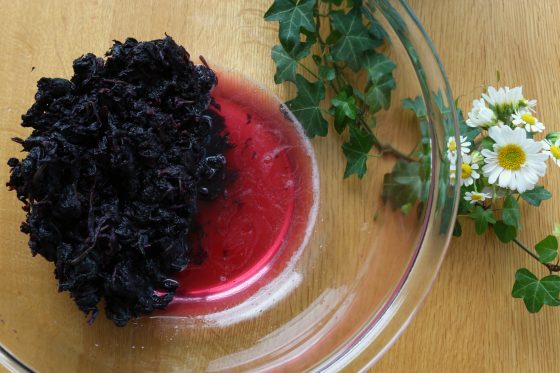
Then, add half (20g) of the salt to the red shiso, using your hands to really get it in there.
After waiting a bit, you should see black water coming out like in the above picture.
This is red shiso scum—remove it.
Then do it all over again: add the remaining half (20g) of salt, using your hands to get it in there, then remove any black water that comes out.
Once you’ve gotten out the scum out of the red shiso, then you add a good amount of umezu from your plums to your red shiso and mix well.
When you do this, the umezu will take on a bright red color.
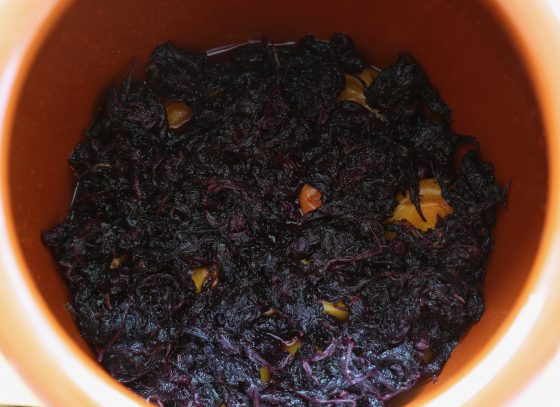
Then, add the red shiso mixed with umezu on top of the plums, put a weight back on top of the container, and then wait for the rainy season to end.

[Step 5]
Wait for the rainy season to end and sunny days to return before putting the plums and red shiso into a sieve and leaving it in the sun.
While umeboshi don’t have to be sundried, doing so sterilizes it and make sit last longer.
It also makes the flavor stronger and the color better.
By the way, as long as you put it out while the sun is out you can leave out for hours; you should need about three days for it to dry.
While it seems that you’re traditionally supposed to leave it out for three days and three nights and expose it to the evening dew, when I tried it I didn’t see or taste any difference when I left it out at night (maybe there’s an unseen difference?) Just leave it out whenever it’s not an impediment to your daily life.
After you’ve sundried it, you can submerge it back into the umezu, and preserve it that way.
The taste and feel changes a bit if you do this, so try it as you please.

The picture above was taken around 2010, which means the umeboshi being dried in the picture was about three years old.
I sometimes re-dry long-preserved umeboshi once the rainy season ends.
If you pickle it using the 18% ratio the recipe above calls for, the umeboshi will remain good for many years.

This umeboshi is five years old.
As the years go by, the plums and the salt harmonize, making it mild.
When pickled using a 18% ratio, you can enjoy the saltiness of the umeboshi.
You can maybe get down to about 18% salt and still store it for a long time, but anything below that is a bit dodgy.
Make sure to pickle your plums using 18% ratio, just to avoid any issues.


